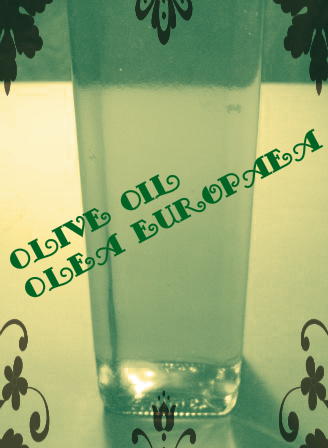
Olive oil for face, particularly extra virgin, is rich, nourishing and heavy. Extra virgin olive oil is particularly suited to dry and mature skin (or to prevent skin from becoming dry and delay maturing!) to hold in moisture and nourish skin cells. It is also one of the most used oils used in the Oil Cleansing method.
If you want to know about effective and natural skin care oils that will turn back the clock, then check this out before going any further.
Greek and Mediterranean cultures depend heavily on extra virgin olive oil for face and skin. It is used as a skin softener and for dry, irritated or sunburned skin. It is also a skin luminizer, meaning that it makes the skin shine and glow!
Extra virgin olive oil is an effective skin cell regenerator. This is the first pressing of the olive and contains the highest amount of nutrients. It attracts moisture while still allowing the skin to breathe.
Personally, I find olive oil a bit too heavy to use on a daily basis. It tends to sit on the surface and is slow to absorb. I do like to use it as a body oil, especially applied before the shower (an Ayurvedic technique). This rinses off the excess yet keeps the skin soft and holds in moisture.
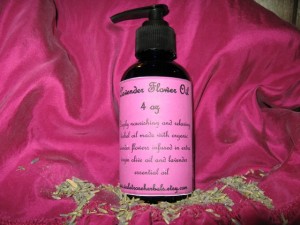
My baby oil blends often contain extra virgin olive oil, as it really nourishes and is so gentle. It is also great for the elderly and for dry, mature skin.
Facial Oil Recipes for All Skin Types
Being that olive oil is so nutrient-dense, it is a good addition to a facial oil blend. Depending upon your skin type, you can vary the amount of olive oil for your recipe.
Dry Skin Facial Oil
Extra virgin olive oil 75% Coconut, almond or jojoba oil 25%
Normal Skin Facial Oil
Extra virgin olive oil 50% Coconut, almond or jojoba oil 50%
Oily Skin Facial Oil
Extra virgin olive oil 25% Coconut, almond or jojoba oil 75%
For sensitive skin, use based on the amount of natural oils you produce and follow the above chart.
Also, experimenting is worth 1000 words! Use the same extra virgin olive oil for face that you cook with and try it out at different times: after washing your face, when skin is still wet; before showering; before bed; and so on. How does it feel? Does it absorb easily or sit? How does your skin react (is it softened or irritated- broken out)?
Skin Cancer Preventative
I’ve mentioned before how I used extra virgin olive oil to sun-bathe as a young adult. Well, interestingly, research done on the preventative effect of antioxidants (present in extra virgin olive oil) on UV-induced skin cancer concludes that “daily topical use after sun-bathing may delay and reduce UV-induced skin cancer development in human skin.”
Dermatitis, Psoriasis & Fungal Infections!
A mixture of honey, beeswax and olive oil (1:1:1 ratio) is useful in managing dermatitis and psoriasis as well as skin fungal infections, including Pityriasis versicolor, Tinea crusis, T. corporis and T. faceiei. This is at an application rate of 3 times daily for up to 4 weeks.
Exfoliating Mask for Even Skin Tone
Another way to use olive oil for face is to use it as part of an overnight, exfoliating mask. This will help to balance skin discolorations and exfoliate dead skin, evening skin tone as well as having a softening effect.
Ingredients:
Extra virgin olive oil 1 teaspoon Apple cider vinegar ¼ teaspoon Water or rosewater ¼ teaspoon
Directions:
Cleanse the skin prior to applying this mask. Mix all the ingredients and apply, leaving on overnight and washing off in the morning.
References:
Preventive effect of antioxidant on ultraviolet-induced skin cancer in mice. Ichihashi, Ahmed, Budiyanto, et al. Journal of Dermatological Science, Vol 23, Supp 1, Pages S45-S50, March 2000.
Topical application of natural honey, beeswax and oliveoil mixture for atopic dermatitis or psoriasis: partially controlled, single-blinded study. Noori S. Al-Waili. Complementary Therapies in Medicine, Vol 11, Iss 4, December 2003, Pages 226–234.
An alternative treatment for pityriasis versicolor, tinea cruris, tinea corporis and tinea faciei with topical application of honey, oliveoil and beeswax mixture: an open pilot study. Al-Waili, Feb 2004.
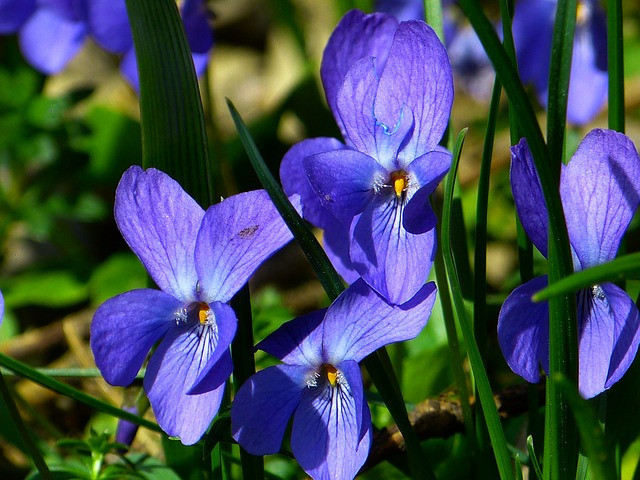
The violet is an especially medicinal little plant and making violet flower oil is literally magic. I went searching for these tiny beautiful flowers yesterday to make one my herbal oils that I often rave about. Though it took me three hours to find a healthy patch, once amongst the violets, it was all worth it.
Making herbal oils is quite easy, yet, if you haven’t made one there are several points to keep in mind. You can read the full details on making herbal oils here. Basically an herbal oil or an herbal-infused oil is macerating (soaking) herbal material (can be flowers, leaves, roots, seeds- any plant material) in a carrier oil.
Tips for Making Violet Flower Oil
1) Violet flowers are especially lovely, yet the leaves are quite medicinal as well. For a blend, you could do 75% flowers and 25% leaves or some other ratio.
2) It is great to let the flowers wilt overnight to avoid excess moisture in your finished oil. Water will make the oil get moldy and not very useful.
3) There are several methods to making herbal oils; I’ve detailed the stove-top method below.
4) Wildcrafting, especially in urban environments, comes with special considerations. Make sure to find a clean area: away from traffic, dog paths or chemically sprayed areas. It can be tricky if you don’t have a yard!
How to Make Violet Flower Oil Using the Stove-top Method
What you will need:
~Violet flowers and leaves- fill the jar to a light pack- if you can’t harvest fresh violet, you can purchase it here
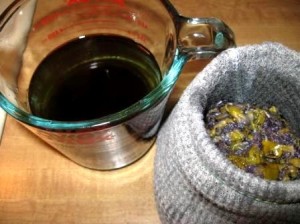
1. Collect violet flowers after the morning dew and before any strong sun hits them. You want the flowers to be fresh, vibrant and intact. Lightly pack a jar the size of the amount of finished oil you would like. For example, I filled up a quart jar with flowers and some leaves too.
2. Allow the flowers to wilt overnight to evaporate some moisture.
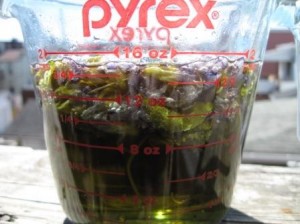
3. Now time to make the oil. Set up a double boiler, which is basically a pan with water in which you will place either a pot or a heatproof glass jar.
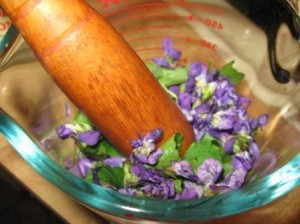
4. Break up the flowers with a mortar and pestle and place in the jar or pot.
6. Place the jar in the water and turn on the fire.
7. Using a chopstick, continually check the temperature of the oil and agitate the herbs. You want the oil to be hot, but not burning. If it is burning your skin, turn the heat down and/or remove the herb/oil infusion until it gets right below that warm/hot spot.
8. Allow the mix to warm for an hour minimum and as long as four hours.
9. Strain the oil through an old cloth or cheesecloth. If using somewhat fresh herbal material, do not press the oil as that will make the water go into the mix. I just lightly tap the material to release some of the oil but don’t expect to collect it all.
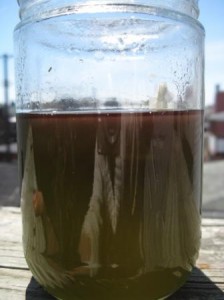
10. If you think there is some water in your mix, allow it to rest and the water will fall to the bottom. You can then decant the upper layer of oil into a new jar.
~Cooling: making it a prime remedy for heat and inflammation
~Mucilaginous: very soothing and moistening texture, especially suited for dry and irritated conditions, including skin
~Dissolving: violet works with the lymphatic system to break down and move blockages
~Magical: violet is the color and holds the energy of the third eye, ajna, chakra and helps to open up intuition and seeing layers within present reality clearly. It can be used most effectively as an anointing oil for ritual use or before bed for revelatory dreams.
~Heart-Opening: keeping an open heart is a pre-requisite to accessing bliss. Little violet knows a great deal about the heart, remaining vulnerable and tender. Those tender spaces are where love resides.
The oil can be applied medicinally to certain areas or used as abyangha oil. It is perfect by itself but can also be blend. I am going to blend this batch with castor oil for a very detoxifying and healing abyangha oil, to move blood and chi. Here’s an article by herbalist Susun Weed where you can learn more about violet flower.
Being quite familiar with castor oil, the Oil Cleansing Method (OCM) and my deep affection for natural skin care oils, I like to experiment and play with different skin care routines and test how they work. Recently I decided to use the OCM as my primary method of cleansing and realized two things which I think are pretty important to emphasize.
1) Putting oil on dry skin is an uphill battle. Instead I recommend wetting the face first with lukewarm to warm water. Apply your oil mix to damp skin as the oil is able to actually go into your pores more easily and carry out impurities.
The original instructions explain to apply the oil to dry skin and massage in well. While there certainly is some absorption, it’s clear that damp skin absorbs oils more readily. And if the goal is to absorb the oils so that they can then work their magic in the pores, we want to make sure it gets in there.
Next is an even more important point that I remembered after experimenting:
2) Regular steaming and use of hot water is irritating to sensitive skin and those with “hot” skin conditions. This may not be news to you but it is important to remember when choosing a skin care routine.
So OCM on a regular, continual basis is not good for people with:
Rosacea
Certain types of acne
Sensitive, inflamed skin or those prone to it
Though I do not have these conditions, my Ayurvedic constitution is Pitta and I tend toward sensitive, reactive skin (that is where it goes when I am off balance).
I noticed two things happening:
1) The pores around my cheek/nose area were getting bigger. When I discontinued OCM, they returned to normal size. Applying cold water did not change this.
2) My skin began to flare up with what appeared to be slight rosacea. My nose began to have some bumps that I thought were blackheads coming out but they lasted longer.
So I have deduced that based on energetic theory and my experiences, the use of the hot water/steam step can exacerbate and perhaps trigger inflammation, including large pores and rosacea.
With that being said, the original guide does recommend not overdoing it which will vary for each person. I think once or twice a month would be sufficient.
Those with Vata- predominant constitutions may benefit from more frequent OCM.
I do practice abhyanga (daily oil self massage) to which OCM is similar. It is not the oils causing the problem, it is the applied heat.
What I offer as alternative for us Pitta types for deep cleansing:
Use a honey mask and pat it onto the skin to remove blackheads and other impurities from the pores.
Make a mix of green clay, buttermilk powder and beet kvass (or other fermented juice like homemade sauerkraut). A bit of jojoba oil can be added to keep it from being too drying. Use this as a mask and rinse off before it gets too hard.
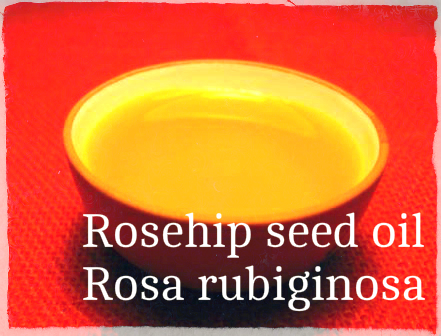
Rose hip seed oil is extremely high in gamma-linolenic acid and Vitamin C (20 times more than an orange), making it ideal for keeping skin youthful and regenerating cells. It is often used to heal scar tissue and prevent fine lines. It has been used by native Chileans for centuries.
The cold-pressed oil is used on its own and as part of blends in creams, skin oils, and serums. I’ve added it as a part of fine skin creams, in a therapeutic oil for healing scars and nerve damage/pain and in anti-aging serums.
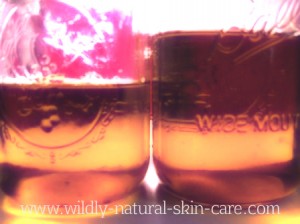
The seed pods are called “hips” and they are the fruit of the rose plant. The teeny, tiny seeds within are where the oil lies and it is forced out through a mechanical pressing. Rosa rubiginosa is the most commonly used species of rose for the oil. The oil is amber to orange and has a nutty scent. It needs to be kept refrigerated as it is very susceptible to oxidation and even then the shelf life is about 2 years.
If you buy a larger quantity, you can rebottle into a 1 ounce bottle, add a bit of vitamin E and some carrot seed essential oil. This will help to preserve it for about 6 months.
Rose hip seed oil is said to be the best oil available for anti-aging and skin rejuvenation. It is the only natural oil with retinoic acid (Vitamin A), which delays the effects of skin aging and increases the levels of collagen and elastin. We also know that plant acids, like retinoic acid, are natural exfoliants and so help to slough off dead outer skin to reveal the new, brighter skin underneath.
Being a “dry” oil, it easily soaks into the skin and does not leave grease. It penetrates almost immediately and can be used undiluted. As always, for best results apply the oil to your skin when still damp from washing or spritzing with floral water.
Rose hip seed oil has been used successfully to treat a whole host of skin problems:
Scars from surgery, tissue trauma, burns and acne
Eczema
Psoriasis
Stretch marks
Wrinkles and premature aging
Hyper-pigmentation and age spots
Dermatitis
Brittle nails, dry hair
Doesn’t that list make you want to go buy some?? I know it makes me want to bottle some up and use it daily.
Here is a recipe that I used to heal some very private scarring accompanied by nerve damage…after childbirth..with good results:
Scar and Nerve Injury Repair Oil
Ingredients:
Rose hip seed oil 1 part
Castor oil 1 part
St. John’s wort (Hypericum) infused extra virgin olive oil 1 part
Directions:
Simply mix these in the proper proportion and shake well before using. I have read some reports that using this oil everyday can cause a bit of an orange hue on fair skin. However, I have not had that experience so just be aware of the possibility.
Jojoba oil acne uses include being a general moisturizer, used for spot treatments and as part of a cleansing oil regime. You can find the best jojoba oil here.
Jojoba oil is a splendidly light, absorptive skin oil. It has an undetectable scent and an SPF of 4. It is a golden-brown color. Growing in arid regions, jojoba oil is from the plant Simmondsia chinensis and is technically a wax.
The jojoba plant is native to the Sonoran Desert of northern Mexico and southern Arizona. It is a plant adapted to the harsh desert climate. The oil preserves these adaptations, being highly resistant to light degradation or oxidation and so has a stable shelf life.
If you are looking for more information on dealing with acne naturally, check out the following articles as well: Natural Remedies for Acne part 1 & part 2. Also consider that more severe acne may require dietary changes and herbal support (if you want to use natural methods). Both of the articles cover those topics.
The Qualities that Make Jojoba Oil an Acne-Eliminator
Jojoba oil has many qualities that make it effective for acne and as a natural skin care oil in general.
Barrier Function of a Desert Plant
As a desert-dwelling plant, jojoba has evolved to create an effective barrier to water loss. This barrier function prevents water loss from the skin when applied. Water loss from the skin leads to all sorts of skin issues, from fine lines to skin fragility. Basically, dehydrated skin is a candidate for stress and stressed skin tends to break outs.
It also actually increases the relative skin hydration.
Superior Skin Penetration & Emollient Action
Jojoba oil is a wonderful moisturizer, which easily penetrates the upper layers and spreads softly on the skin. It is an emollient for dry, aging, distressed skin, yet I find it does not leave an oily residue. Jojoba oil is quickly absorbed by the skin and persists in the uppermost layers without clogging pores. With repeated daily application, jojoba oil presents a significant amount of persistence in the skin (meaning that it’s helpful effects continue working throughout the days, it doesn’t just “disappear”).
Mimics Human Sebum
Squeaky clean is an invitation for the skin to attempt to regain balance by over-producing it’s natural oil, called sebum. Over-production of oil is one of the factors leading to acne and so a gentler strategy is to work with the skin. Oil serves many protective functions and keeps the skin youthful.
The theory is that since jojoba oil mimics sebum, the skin does not need to produce as much oil, therefore alleviating over-oil production which can cause acne. In addition, it keeps the skin soft and lubricated.
Wound Healer
As jojoba oil is a wound healer, it can help to clear up lesions that occur with acne and quicken the healing process of scabs, sores and other marks left by cysts and pimples. It can also help to prevent scars from forming.
How Do I Use Jojoba Oil for Acne?
Jojoba oil can be used in numerous ways to help heal acne, scars and marks.
Healing Clay-Jojoba Oil Acne Facial Mask
This has been shown to be effective for both inflamed and non-inflamed skin lesions present with mild acne vulgaris.
-Mix a small amount of a healing clay, such as rhassoul, kaolin, or green clay with some jojoba oil to make a paste.
-Apply to the skin and allow to work for about 15 minutes.
-Gently rinse the mask off with pure water, spritz the skin with a flower water toner and apply a small amount of jojoba oil to moisturize.
-Apply 2 to 3 times per week for 6 weeks for best results.
Here are some other jojoba oil acne treatments and natural body care uses:
As a Moisturizer, first wet the skin with a floral water or plain water and then use up to 6 drops of jojoba oil, gently massaging the skin. You may pat off excess with a damp washcloth if necessary.
Removing make-up easily, cleanly and smoothly
Can be used on the lips as well as an emollient
As a hair conditioner it penetrates the hair shaft, conditions the hair and scalp, creating soft, shiny hair. All this and it won’t cause break outs.
Using the oil cleansing method to clean the skin
As an acne spot treatment, mix jojoba oil with some tea tree oil and dab on the spots. Repeat throughout the day.
References: Anti-inflammatory effects of jojoba liquid wax in experimental models, Department of Pharmacology and Toxicology, Ain Shams University, Cairo, Egypt, June 2004. Habashy, Abdel-Naim, Khalifa, & Al-Azizi.
Clay Jojoba Oil Facial Mask for Lesioned Skin and Mild Acne – Results of a Prospective, Observational Pilot Study. Research in Complementary Medicine, Vol. 19, No. 2, 2012. Meier, Stange, Michalsen, & Uehlek.
What is Jamaican black castor oil (AKA JBCO) and how is it different than other castor oils? Is it more potent like many people say? How is it used for making the hair thicker and stopping hair loss?
JBCO is made from the beans or seeds of the castor plant (Ricinus communis), just like all other kinds of castor oil. The difference is in the processing method. While clear castor oil is pressed from fresh seeds, Jamaican black is made by first roasting those seeds and then pressing them (there’s a more detailed account of that below).
This might not seem like too big of a difference. However, it actually is on a few levels. First, the roasting process creates a small amount of ash. The ash tends to be more alkaline (higher) in pH- like lye but not to a caustic point. This higher pH can help to clarify the scalp and remove anything that may be clogging the pores.
Alkaline substances also open the cuticles, allowing the oil to get in and do its work. This is great for times when your hair might not be as thick as you’d like it to be.
The other level at play here is energetic. In general, castor oil is heavy, moist and neutral. JBCO is slightly warmer than clear castor oil and so is better suited for cold conditions, which tend to also be dry in nature.
So, Jamaican black castor oil is better for:
Dry skin
Dry scalp with flaking
To thicken hair
To exfoliate scalp which helps to let the hair grow
Though the types of castor oil could be used interchangeably in a pinch, the two really do have specific indications based upon the processing method. Mostly people, including myself, use clear castor oil for Edgar Cayce-inspired medicinal packs and JBCO for hair treatments.
To Use Castor Oil for Hair Growth and Conditioning…
This should be applied before bedtime twice per week and washed out in the morning. Either pure or Jamaican black castor oil can be used. Applied to the hair it reduces itchiness and supports growth.
Warm castor oil slightly if desired to make it a thinner consistency that is easier to apply.
Pour some castor oil into palm of hand and with other hand, apply throughout the scalp, focusing particularly on parts where hair is thin.
Part hair in many ways to make sure the scalp is thoroughly coated. Castor oil can also be applied to hair, focusing on tips particularly.
Cover head with shower cap and leave on overnight or for at least four hours.
Wash out with a gentle soap-based shampoo unless your hair is really dry then you may not need the soap
There are three different ways to produce castor oil and they are listed below. This should help to clarify the differences between the JBCO and clear castor oil.
Three ways to extract the oil:
1) Cold pressed
2) Roasted and pressed
3) Solvent extraction
Jamaican black castor oil is made by a complex process of parching, beating and boiling the seeds before pressing for the oil whereas cold pressed is the pressing of the fresh, unroasted seeds. Solvent extracted castor oil uses hexane to extract the oil from the beans and should not be used for cosmetic or medicinal purposes. This is the castor oil used for industrial purposes only.
Three types of Castor Oil:
1) 100% Extra Virgin, Cold-Pressed
This castor oil is as pure as it gets. The seeds are pressed fresh as they have been since ancient times. The fixed oil is almost colorless when pure.
2) Refined
This castor oil has been pressed fresh and is then taken through the refinement process. Depending upon the brand, this could involve chemicals. Mountain Rose Herbs offers a refined castor oil that is processed without chemicals. Always be sure the brand is free from hexane, a chemical solvent commonly used to extract the oil from the beans. Refined might be used for a cosmetic preparation, like a cream, where the consistency is more suited. For medicinal uses, I go with unrefined.
3) Jamaican Black Castor Oil
JBCO is made in a traditional, hand-processed way where the seed is roasted, beaten with a mortar, boiled and then pressed. The roasting produces the black color and a richer, earthier aroma. If the castor oil is too dark, it has been over-roasted and is burnt. Burnt castor oil is more irritating and should be avoided. I like Tropical Isle Living’s Jamaican black castor oil.
Personally, I find the smell delightful! It is rich and earthy and I love that! Some people (probably more used to synthetic scents) seem put off by it but I invite you to embrace your wild self and see what you really think about it :)
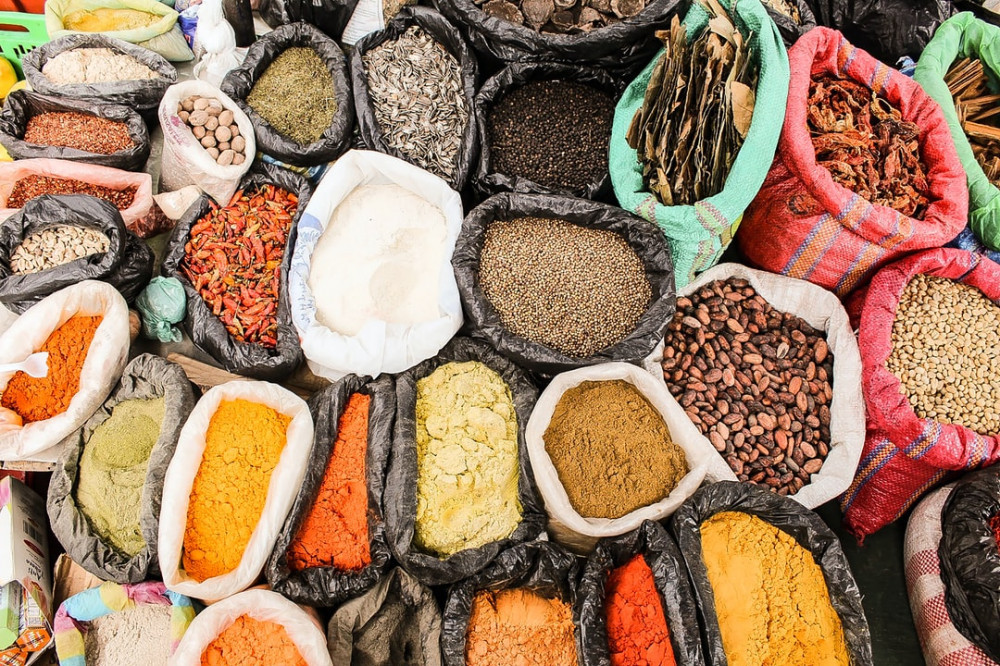
Lately I have been very intrigued by the idea and practice of decorating the body using natural colorants. Natural ways to create the colorants include infusing oils with herbs for color using plants that have high amounts of pigments. Some of these plants include indigo, madder, henna, and alkanet.
A few years ago, I played with natural dyes for cloth and it was super fun. I made an indigo dye vat and colored cloth for a reupholstering project and also for children’s activities. We took all these pieces of unused natural fabrics (like drop cloths, old curtains and so on) and dyed them reds, blues, purples, yellows using Staghorn sumac, indigo, grapes and goldenrod.
For that purpose, the plant materials were decocted into water and then the cloth was either soaked or simmered with the resulting liquid dye. The cloth was also usually prepared with a mordant (a fixative for the color) and then dyed.
So, how does it work when we want to paint the skin? Sure, the plant could be powdered and made into a paste to apply. This is awesome too. I am curious though if a more glossy or transparent effect could be made by first coloring the oils and then using them directly on the skin.
This is what I am experimenting with now! I’d like to create colored oils to be used for body painting, decorating and generally celebrating the beauty of the body. We will see if infusing oils with herbs for color works or if the finished oils will not show up on light skin.
Castor oil uses stem from its many healing virtues and desirable qualities. Based upon its diversity of usage, it is commonly incorporated into natural formulations for hair, skin, nails and lips.
Castor oil is also used as a thickener in recipes, hair and nail care. It is a rich, smooth oil great for solid perfumes, lip balms and products designed to provide a protective barrier. It leads as the primary oil used in most creamy and glossy lip balms, as it is naturally shiny and protective to the lips. Since it dissolves in alcohol, it is often used as a perfume fixative. In the creation of perfume, oftentimes both oil and alcohol-based plant extracts and other substances are used to make the right scent.
It has many applications for natural skin and hair care. One well-known castor oil use is as a hair growth stimulator, strengthener and conditioner. Its use for hair care and growth was stated in the Ebers Papyrus, a medicinal text from ancient Egypt. Something that has been used for that long is worth looking into.
Buy the best castor oils here.
Ricinoleic acid is the main constituent of castor oil and is known to prevent the growth of viruses, bacteria, yeasts and molds. It is used topically for ringworm, keratoses (non-cancerous wart-like growths), skin inflammations, abrasions, fungal-infected finger and toenails and chronic itching (pruritis). Castor oil packs soothe inflammation and are the recommended way to apply it for these ailments.
Other conditions that may be alleviated with castor oil use include skin ulcers, eye irritations, wounds, abdominal stretch marks, sebaceous cysts, warts, liver and age spots (senile lentigo), local infections and infected puncture wounds! Please consult with your health care practitioner before using castor oil for more serious conditions.
Castor oil’s ability to alleviate boils and swellings along with its antimicrobial and antifungal properties make it ideal for infected skin including warts, fungus, pimples and acne.
The Benefits of Castor Oil
The benefits of castor oil are many. Here I will focus on the external applications though castor oil has numerous internal and medicinal uses as well.
Castor oil is highly emollient, meaning that it makes the external layers of skin more pliable and soft. It increases hydration by preventing evaporation of water from the skin and hair layers. Moisture is the basis of healthy hair and skin.
It is used specifically for softening rough, dry heels, knees and elbows and additionally it penetrates patches of eczema and psoriasis with its moisturizing abilities. Being a warming oil, it is very good for dry skin.
As a traditional hair oil, castor makes the hair shiny as a conditioner and encourages hair growth by strengthening the shaft, removing dandruff and debris and moisturizing the scalp.
On the nails castor oil forms a protective shield against soap, hot water and winter dry skin. It also is a nail strengthener.
I have been using natural skin care oils for years successfully and make custom blends for other people as well. I absolutely love oils and have converted over from creams almost entirely.
Some common questions I receive are ‘Won’t using oils make me greasy?’ or ‘will oils cause my skin to break out or clog my pores?’
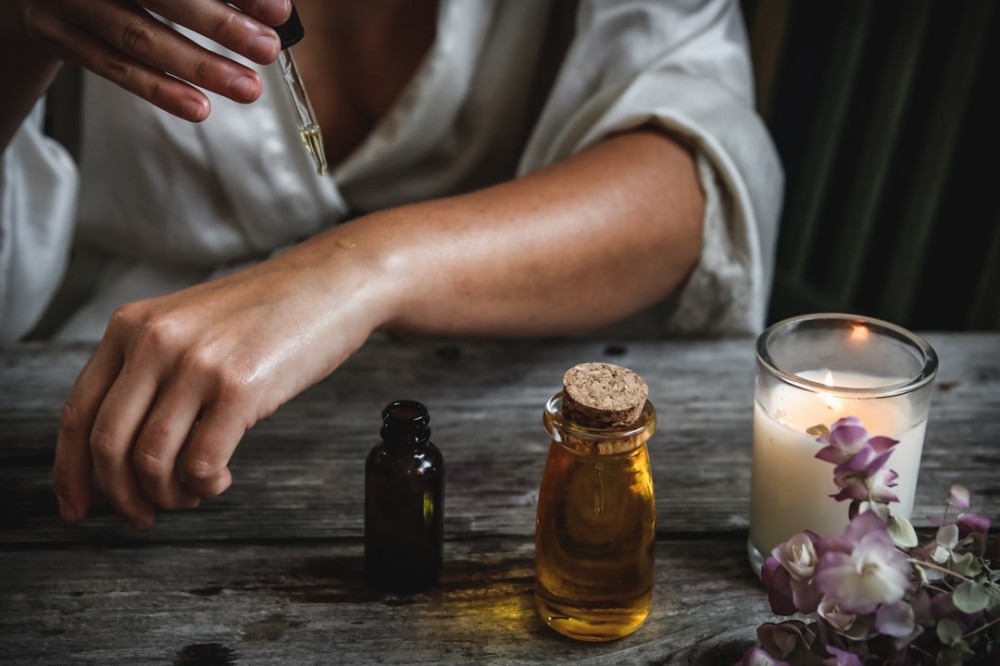
While it is important to choose the right oil for your skin type, it is just as important to properly apply the oils. It is true, as you probably know, that applying oils incorrectly will just leave a layer of oil that just stays on the surface. Nobody wants that! And it prevents the oils from working since they are not being absorbed optimally.
The most important part of applying oils without getting greasy is to apply to damp or wet skin! Then massage and pat the oils into the skin, allow to be absorbed, and use a damp cloth to remove excess. When removing excess, literally just put the cloth over the skin and pat (don’t rub or pull or wipe).
Almond oil for skin is quite versatile. It is very light and does not leave excess oil on the skin. It has been used in many cultures for its penetrating and moisturizing abilities and ease of use.
The simplest way to use almond oil for skin is too add some essential oil to it and use as is. It can be used on the whole body, including the face. Being nearly odorless, it makes a wonderful aromatherapy massage oil.
Be sure to purchase cold-pressed, organic almond oil.
Almond oil has a high nutritional value, being particularly vitamin E and fatty acids. It is a widely used carrier oil that is suitable for all skin types. Almond oil is one of the best for making herbal-infused oils and for delicate facial oils. I have also used it in skin creams and as a body oil. It is really useful on its own and to “cut” heavier oils to create a lighter finished product.
Dong Quai Almond Beauty Oil
Dong quai (Angelica sinensis) is a medicinal herb native to China. It is often used as a complexion herb, decreasing blemishes and encouraging healthy skin and blood flow. It is also an estrogenic herb, making it potentially useful in preserving youthful skin. Dong quai is also used for eczema, alopecia and rosacea. All of the essential oils in this recipe are useful for preventing wrinkles and fine lines.
Make an herbal-infused oil with the dong quai root and almond oil. Strain this and add the essential oils. This can be stored in a narrow mouth bottle and used as a facial oil.
As with any natural skin care oil, first apply water to the skin in the form of flower water, plain water or another toner, then massage in some almond oil while the skin is still damp. This helps to lock in the moisture and creates that dewy, moist skin that we all love.
Ayurvedic Almond Oil-Chickpea Mask
This is traditionally used by Indian women on their wedding day to cleanse, tone and invigorate the skin on the whole body. It combines the antiseptic, blood circulating properties of turmeric with the cleansing chickpea powder and moisturizing almond oil. Use this weekly or for special occasions when you really want to glow! This recipe is enough for the whole body.
Ingredients:
Chickpea powder 1 cup
Turmeric powder 3 tablespoons
Almond oil- enough to make a paste
Directions:
Mix ingredients together. Apply and allow to sit until dry. Remove by rubbing with hands, which will exfoliate the skin. It is also known to remove fine hairs. Rinse the remaining mask off with water and be sure to apply moisturizer.
Comfrey oil (Symphytum officinale) is another potent herbal remedy for skin care. It is high in allantoin, a mucilaginous healing substance that causes cell growth.
An old European folk remedy, many uses of comfrey abound.
Being mucilaginous, common uses of comfrey include healing wounds, preventing scars and treating existing ones, decreasing dryness and flaky skin, and soothing irritated skin.
Comfrey also has mild astringent and drawing qualities, making it useful for alleviating cysts, toning a loss of texture/firmness on the skin and increasing movement of fluid within the joints.
It is anti-inflammatory and analgesic and has been used externally as an ointment to assist in the healing of sprains and broken bones.
It also shows effectiveness in treating atopic dermatitis, psoriasis and eczema.
Care needs to be taken not to use comfrey too soon on wounds, as it may heal the top layers before the lower which could lead to infection. Comfrey root is also fairly high in pyrrolizidine alkaloids, which are a liver toxin. External use in small doses when the liver is healthy is considered safe.
Both the root and leaf are useful for making comfrey-infused oil. Comfrey leaf has an irritating and prickly texture. It can cause some contact dermatitis; however, it is a soothing agent when broken up! The root is very juicy, mucilaginous and high in allantoin.
If possible, use freshly dried herbs for this purpose.
To freshly dry comfrey root: dig the root when it is dry weather, clean by hand or using some water and a vegetable brush if needed. Brush the root gently however. Chop finely; lay out on a paper bag overnight.
To freshly dry leaves: harvest, wipe the dirt off with a towel, and allow to dry whole overnight.
Here is my favorite comfrey oil recipe:
Ingredients:
8 oz Comfrey leaf (70%) 4 oz Comfrey root (30%) Extra virgin olive oil, to cover, approximately 16 ounces
Directions:
The roots should already be broken down by chopping. Go ahead and break up the leaves by hand. To make this using the cold infusion method, put all the herbs in a 16 ounce glass jar, cover with olive oil, cap and shake. This can steep for 28 days. To strain, use an old t-shirt lined in a strainer, pour the mix through into a bowl and squeeze the t-shirt with herbs in it. The strained liquid is your comfrey oil!
To make comfrey-infused oil using another method, including those that take less time, check out the article Herbal Oils.
Reference: Efficacy of a Comfrey root extract ointment in comparison to a Diclo-fenac gel in the treatment of ankle distortions: Results of an observer-blind, randomized, multicenter study. Predel, Giannetti, Koll, Bulitta, and Staiger, 2005.
Photo Credit: By Frank Vincentz (Own work), via Wikimedia Commons
Herbal oils are fantastically useful and practical to have on hand.
I’ve used them as an emollient for the bath, as a body moisturizer, for all dry or irritated skin, on the hair and scalp, fingernails, for massage, as spiritual anointing oils, daily abyangha practice, as a base for creams and salves, face moisturizer, as cleansing agents…herbal oils are mult-faceted.
Herbal oils are also called infused oils, or herbal-infused oils. They are a mixture of herbs with a natural skin care oil, in this case a “carrier oil”.
They are NOT essential oils. Essential oils are made through a distillation process.
Herbal oils are made through soaking the plant material into a carrier oil for a set period of time. This process extracts the oil-soluble plant components into the carrier oil. Then, that is strained out and what is left is the herbal oil which can be used for skin, hair, or any concoction you are making.
The most commonly used carrier oil is extra virgin olive oil, though they can also be made with coconut oil, jojoba oil, sweet almond oil, apricot kernel oil, grapeseed oil and most other plant oils, or even lard or ghee.
The herbs chosen for the process will depend on what purpose the oil will be used.
Some common herbs used in this preparation include calendula flowers, comfrey root and leaf, plantain leaf, elder flowers and lavender flowers. I’ve made oils with many other herbs, like rose petals, dandelion flowers, marshmallow root, dong quai, and poke root.
Though I prefer to make them with dry or freshly dried herbs, some herbalists use fresh herbs for their blends. I’ve had a few batches of freshly-made herbal oils develop mold and though it can be removed, I’d rather not be worried about re-growth.
How to Freshly Dry Herbs for Your Oils
Harvest the herbs, lay out somewhere with good air circulation and leave for 12 to 24 hours. That’s it! When the herb appears and feels like it is losing its water content, it is ready to use. It will be somewhat withered but not yet crunchy.
There are several ways to make herbal oils as well. It is always good practice to label creations with the herb used, oil used, quantity of each, method used and date.
Creating an herbal oil is a magical process.
Way 1: Cold Infusion
Fill jar ¾ full with dry herb
Cover with carrier oil of choice
Allow to steep in a cool, dark place for 4 weeks
Strain and squeeze herb (at this point called the marc) to get every last drop. You may run the herb and oil through some layers of cheesecloth or an old cut up t-shirt which makes it easier to squeeze.
Way 2: Stove-top Method
Set up a double boiler and turn stove on. Allow the water in the double boiler to get to a simmer. Alternatively you can turn the stove on after step #4
Fill Pyrex jar with herb
Cover with carrier oil of choice, fill to just above the top of the herbs
Place the jar in the water
Using a chopstick, continually check the temperature of the oil and agitate the herbs. You want the oil to be hot, but not burning. If it is burning your skin, turn the heat down and/or remove the herb/oil infusion until it gets right below that warm/hot spot.
Allow the mix to warm for an hour minimum and as long as 4 hours.
Strain, allow to cool, and press out the oil.
Way 3: Sun Infusion
Follow the procedure for Cold Infusion above but…
Rather than storing in a cool, dark place, set out in a sunny area or windowsill
Leave for up to 4 weeks
Strain as above
Way 4: Yogurt Maker or other low, slow heat Method
Fill jar to ¾ full
Put in a yogurt maker and cover
Allow to infuse for 24 to 48 hours
Strain as above
A note on this method: the yogurt maker maintains a constant temperature of about 90 degrees F, so any other low, slow heat methods need to be around that temperature.
I’ve had a lot of folks ask about using a Crock Pot to make herbal-infused oils, and unfortunately, the lowest setting on these is about 150 degrees F, which is TOO HOT for this. The high heat will degrade both the herbs and the oils. That being said, you can greatly nurse the Crock Pot for a fresh and juicy herb, it requires lots of watching over a period of time.
Which method do I prefer?
It really depends on time availability. I find myself using the cold and stove top methods most often, followed by the yogurt maker. I’ve made just a few sun infused oils, particularly with fresh herbs and they’ve turned out well.
Crafting Herbal Oils for Specific Uses
Looking to make an herbal oil for a specific use like acne or psoriasis?
Maybe you’d like to create an erotic massage oil or something for sore muscles?
As herbal oils can be made with any herb, I encourage you to browse the ‘herbal skin care’ section of this site to learn all about how to make a healing oil for your particular needs.
The second part of crafting an herbal oil is selecting the carrier oil, potent in the final product as well. For that please check out articles within the ‘natural skin care oils’ section.
 The violet is an especially medicinal little plant and making violet flower oil is literally magic. I went searching for these tiny beautiful flowers yesterday to make one my herbal oils that I often rave about. Though it took me three hours to find a healthy patch, once amongst the violets, it was all worth it.
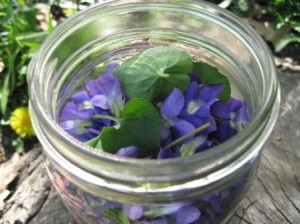

 Lately I have been very intrigued by the idea and practice of decorating the body using natural colorants. Natural ways to create the colorants include infusing oils with herbs for color using plants that have high amounts of pigments. Some of these plants include indigo, madder, henna, and alkanet.
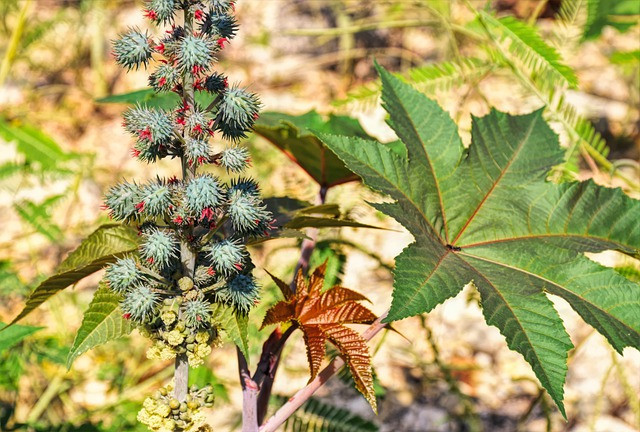 Castor oil uses stem from its many healing virtues and desirable qualities. Based upon its diversity of usage, it is commonly incorporated into natural formulations for hair, skin, nails and lips.
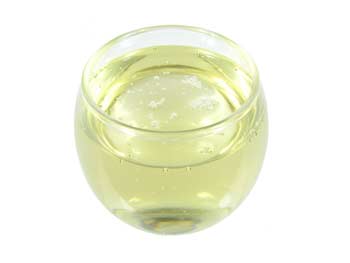 The benefits of castor oil are many. Here I will focus on the external applications though castor oil has numerous internal and medicinal uses as well.