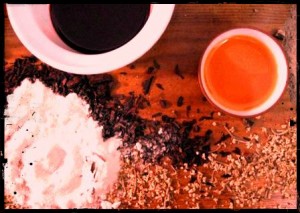
Lately I have been very intrigued by the idea and practice of decorating the body using natural colorants. Natural ways to create the colorants include infusing oils with herbs for color using plants that have high amounts of pigments. Some of these plants include indigo, madder, henna, and alkanet.
A few years ago, I played with natural dyes for cloth and it was super fun. I made an indigo dye vat and colored cloth for a reupholstering project and also for children’s activities. We took all these pieces of unused natural fabrics (like drop cloths, old curtains and so on) and dyed them reds, blues, purples, yellows using Staghorn sumac, indigo, grapes and goldenrod.
For that purpose, the plant materials were decocted into water and then the cloth was either soaked or simmered with the resulting liquid dye. The cloth was also usually prepared with a mordant (a fixative for the color) and then dyed.
So, how does it work when we want to paint the skin? Sure, the plant could be powdered and made into a paste to apply. This is awesome too. I am curious though if a more glossy or transparent effect could be made by first coloring the oils and then using them directly on the skin.
This is what I am experimenting with now! I’d like to create colored oils to be used for body painting, decorating and generally celebrating the beauty of the body. We will see if infusing oils with herbs for color works or if the finished oils will not show up on light skin.
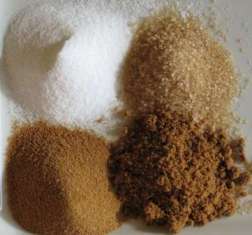
A homemade or purchased honey cleanser will soften your skin and pull out impurities. Good for all skin types, honey is moisturizing as well as cleansing.
It has been used for at least 4000 years in skin care. I really enjoy using honey in both raw whole and powdered forms as cleansers and masks.
Traditional knowledge is one of my guiding sources. Why? Because in many aspects, ancient people were more conscious of their connection to the Earth and our synergistic relationship. This is all knowledge still available to us and using natural skin care is one way to open up that relationship.
Honey has been used since ancient times for wound healing. Its properties include cleansing, acting as an antimicrobial agent, and promoting cell growth/repair. It is highly regarded in Ayurvedic medicine. Cleopatra used milk and honey baths with frequency to preserve her youthful skin. The Greeks used it to treat all manner of skin disorders. And in China, a blend of honey and ground orange seeds is still used for the prevention of blemishes.
Check out my recipe for a soothing honey cleanser using powdered milk and honey. There are more recipes on using honey below…
You can also use honey straight! Just keep your hair back and apply the honey, making sure to completely cover the skin. There are special kinds of honey, like manuka, that have even more potent benefits. You can find those locally or there are many online to choose from.
I personally prefer raw honey, or if unavailable, local honey. Local honey has the additional benefit of exposing you to the local pollens in very small amounts, enough to potentially decrease immune response (allergies).
So What Does Honey Do for the Skin?
1) Honey is antibacterial. It is one food that never goes bad. Containing natural antioxidants and hydrogen peroxide leads to its antibacterial powers. The antibacterial activity is through honey’s ‘inhibine’ factor which turns into hydrogen peroxide.
2) It is an acne remedy. In addition to the antibacterial property, it is anti-inflammatory. Honey has been shown to kill Propionibacterium acnes, bacteria largely at play with acne conditions. It can be used directly on pimples as a spot treatment and mixed with yogurt as a mask for acne.
3) Skin softener – try it! Using a honey cleanser, you will notice a softening effect right away.
4) Water-attracting (also known as humectant), meaning your skin will be more moisturized using honey. It is a moisturizing agent making it particularly suited for dry skin.
5) Treats burns with remarkable effectiveness. It is soothing, stimulating and healing.
6) Increases circulation to skin, revealing new, brighter skin and increasing cell turnover.
7) Successfully used for the treatment of infected wounds. There are large variations of activity between various honeys so be sure to get the highest quality possible (raw and local or manuka). Honey even kills antibiotic-resistant strains!
8) It has a pulling ability – honey will pull dirt, oils, and residue out of the skin.
Honey Recipe and Uses
Traditional Honey Cleanser Recipe
Ingredients: Honey 1 teaspoon
Finely ground almonds 2 teaspoons
Lemon juice a few drops
Directions:
Mix ingredients together. Rub this mix gently into the skin and rinse with warm water.
Honey also mixes well with:
Oils, including almond oil, olive oil and coconut oil
Milk and yogurt
Oats
Fruits, including bananas, avocado and berries
Complexion herbs such as rose, lavender, chamomile and green tea
Honey can be used as a simple cleanser or mixed with other ingredients for masks, baths and spot treatments. Be sure to buy the highest quality you can find for the best effects!
References:
Honey for wounds, ulcers, and skin graft preservation. Postmes, Van den Bogaard, and Hazen, M. Lancet. Vol. 341, no. 8847, pp. 256-257. 1993.
A three-stage strategy in treating acne vulgaris in patients with atopic dermatitis- a pilot study. Ehsan Y. Sabry. Journal of Pakistan Association of Dermatologists 2009; 19: 95-105.
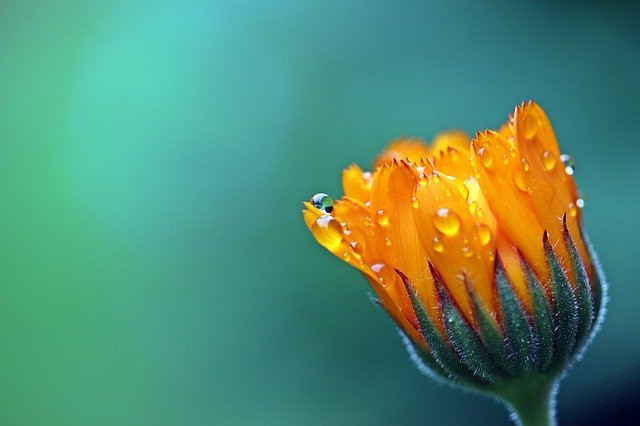
Below are 7 calendula recipes for skin care uses. If you want to learn more about the particular uses for this herb, check out Calendula for Skin.
I just love herbs that can be used in so many ways, for so many reasons! There are a variety of ways to use this sunny herb.
I use the flower mostly; though I like to use the leaf as well, it is not commercially available. But if you grow it feel free to use both. If I wanted to use it as a hair rinse for lightening blonde hair or as a dye, I would just use the flowers.
When making alcoholic extracts of calendula, it is necessary to use a high percentage of alcohol as calendula is resinous and resists extraction at lower amounts. The calendula recipes for tinctures below make an approximately 65% alcohol base. Grain alcohol is hard to come by in many states however.
Organic Calendula Flowers are a beautiful golden-orange color, which means they were dried correctly and retain their medicinal properties (herbs should retain their natural color when dried; if they are brown when they shouldn’t be, this means they’ve lost their properties).
1 cup flowers, packed
2 oz distilled water
8 oz grain alcohol, 190 proof
Directions:
Break up the flowers by hand or in a mortar and pestle. Put the flowers into a 12 ounce glass jar. Mix the water and alcohol together and pour over the calendula flowers. Shake this daily for 28 days. To strain, use cheesecloth lined in a strainer (old t-shirts work well too!) or a tincture press.
Fresh Calendula Flower Tincture
Fresh is best if you have it! This is so simple to make, LOVE it.
Ingredients:
Fresh flowers and leaves, enough to tightly fill a 16 ounce glass jar. Use about 70% flowers and 30% leaves
~16 oz grain alcohol
Directions:
Break the flowers up by hand. Pour the grain alcohol over the flowers. Shake this daily for 28 days. To strain, use cheesecloth lined strainer or a tincture press.
Calendula-Infused Oil
Ingredients:
1 cup dried flowers
12 oz extra virgin olive oil
Directions:
To make a cold infusion, simply break up the flowers and cover with oil. Be sure to remove air pockets, cover and shake. Allow this to steep for 28 days. Strain using old, clean t-shirts and squeeze out all the oil.
Basically this is an infusion (made similarly to a tea!). It can be used as a wound wash, a cleanser, hair rinse or a compress!
Ingredients:
2 tablespoons dried or fresh flower and leaf
8 oz water
Directions:
Put the herb in a cup. Boil water and pour over herb. Allow to steep at least 15 minutes or up to 2 hours. Strain using reusable coffee filter and use the infusion when cool enough.
A Beautiful Way to Cleanse the Face
This can be a standalone cleanser or formulate a cleansing grain with calendula powder or whole flowers ground up.
Ingredients:
2 teaspoons Calendula flowers, powdered
½ teaspoon water, milk or rosewater
Directions:
To use this, just pour the calendula powder into the palm of your hand and add the liquid to make a paste. Rub the paste in circular motion on your face and rinse with tepid water.
Calendula Poultice
This may be the simplest recipe to make- basically just macerate (break apart) the herb and put it on the skin!
Ingredients:
Fresh flowers- enough for the area to be covered
Directions:
Grind fresh flowers in a blender, food processor or by hand, adding just a bit of water if needed. Take all this mash and apply it directly to the skin, covering with an old t-shirt or layers of cheesecloth. Wrap firmly and keep in place with a safety pin. This can be removed after a few hours and the skin washed off with some cool water.
Bay rum oil is a classic fragrance for men originally made in the west Indies and is used as a cologne, aftershave and skin toner. It is made like a tincture of some very readily available ingredients. There are really 2 distinct products here: an aftershave and an oil.
Both of these products can be used for deodorant purposes. Yes, many potential mates want you to smell like the spicy and natural Earth! Homemade or all natural products are not offensive like chemical products. They have a subtle effect and add to allure rather than knocking people out when you walk by them.
The basic ingredients to make bay rum oil and astringent are the following: rum, leaves and berries of the bay tree (Pimenta racemosa), citrus peels like lime or orange, and spices including cloves and cinnamon. Traditional Bay Rum is made from the leaves of the Caribbean tree Pimenta racemosa. Leaves of the Bay Laurel tree, Laurus nobilis, can be substituted. They have similar properties but of course, not identical. Using a creative combination of these ingredients, you can make your bay rum blend smell how you like.
Bay Leaf Essential Oil Uses
Bay leaf essential oil is used to control dandruff, promote hair growth and stimulate lymph and blood flow. It has a hot nature and so will create a heat sensation when applied. If you tend to be a hot person, err on the lower amount of essential oil added to the oil blend.
All of the ingredients used in bay rum oil and aftershave are grounding yet stimulating. Bay rum makes a great skin toner and will help to prevent razor burn, bumps and break outs of all sorts.
So here go 2 recipes to get you started…
Bay Rum Aftershave
This makes a bracing, astringent aftershave to help prevent razor burn, decrease large pore size and clear acne. It also acts as cologne and can also be used under the pits to freshen up. This is adapted from Rosemary Gladstar’s Family Herbal.
Ingredients:
Bay leaves, fresh if possible Allspice, ground or grated 1 tablespoon Cloves, whole 1 tablespoon Ginger, grated 2 tablespoons Orange or lime peel 1 whole Rum Lime hydrosol (optional) Bay (Pimenta racemosa) essential oil (optional)
Directions:
Fill a 16 ounce jar with bay leaves and add the other spices and citrus. Cover this with rum, shake and allow to steep for 4 weeks.
Strain out the herbs and rebottle the resulting liquid. Lime hydrosol and Essential oil of bay (Pimenta racemosa) can be added, but be sure to add just a few drops of bay and test the smell.
Bay Rum Oil
This is super easy. Basically, mix a carrier oil with essential oil of bay (Pimenta racemosa), shake and use.
Ingredients:
Carrier oil, such as sweet almond or jojoba Bay essential oil (Pimenta racemosa)
Directions:
Get a cool bottle that you will be happy looking at and using regularly. Pour your carrier oil of choice into the bottle, leaving about an inch or two at the top. Then start adding drops of essential oil at a rate of 10 drops per ounce of carrier oil. Cap and shake, then test if the scent is strong enough for you.
When you get it to your liking, cap and it’s ready to use!
A modification of this recipe is to first infuse the carrier oil with bay leaves for a month, strain and then add essential oil.
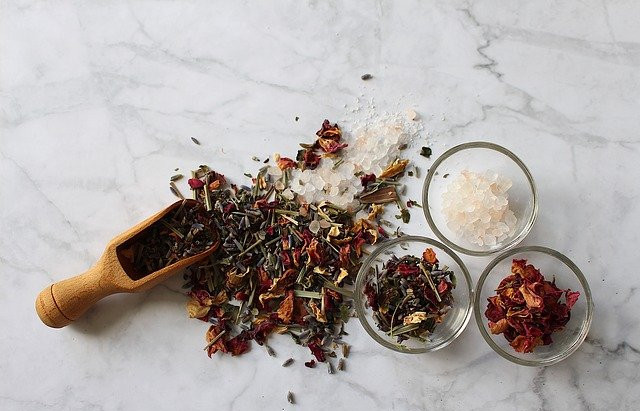
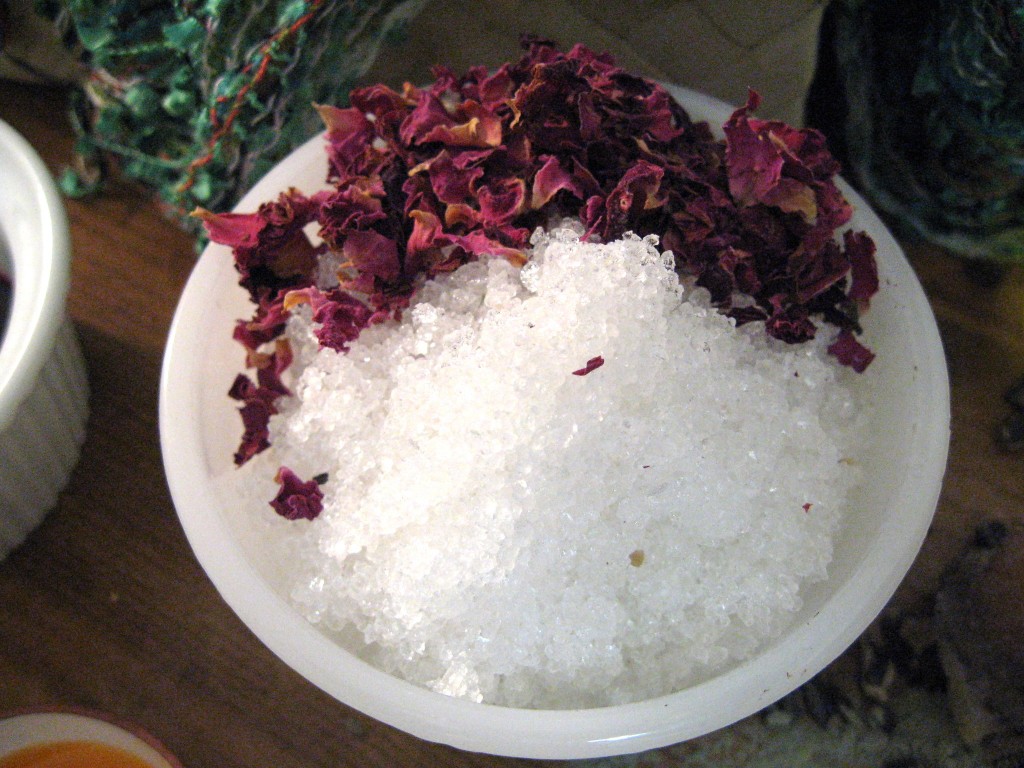
Make your own custom bath salts
You can craft or find a bath salts recipe for your particular needs: sore muscles, relaxation, purifying or more. Bath salts are healing, relaxing and can help to relieve minor aches and pains.
In addition, sea salt baths are detoxifying and cleansing. They can be infused with essential oils for an aromatic an delightful experience and crafted with herbs for therapeutic effects. Bath salts are both easy to make and inexpensive. All of the ingredients can be found at Mountain Rose Herbs.
Bath salts are a combination of minerals, clays and herbs.
The basic ingredients for any bath salts recipe:
-Sea salt or Epsom salts -Sea salt is a detoxifier and aligns the body’s electromagnetic field. Epsom salts contain magnesium, which is required for muscle functioning. It can help to ease pain and break up lactic acid that has formed from overexertion. -Borax is a natural mineral called sodium borate. It is an alkaline water softener and a cleanser. -Baking soda is another mineral called sodium bicarbonate. It is a skin softener, cleanses and deodorizes and provides alkalinity. -Clays are detoxifying, drawing and cleansing –Essential oils -Herbs are optional
A very basic recipe is to simply use 1 to 2 cups of sea salt in the bath. You could add essential oil if you had it or substitute Epsom salts.
Following is a more elaborate recipe for making bath salts. To this framework, you can get really creative with what you have on hand!
Directions:
To make these, first mix all the dried material together in a container with a lid. Then add the essential oils, stir through the dry ingredients, put the lid on the container and shake, shake, shake! Allow this to settle for a few hours and then give it another shake. You want the essential oils to really be strong, as they will be greatly diluted in the bath.
Keep these out of reach of children.
This is the best place to get allll of your ingredients for these recipes :)
Ingredients for a basic recipe:
2 cups borax 2 cups Epsom or sea salt 1 cup baking soda ½ cup kaolin clay 1/3 cup powdered herb 150 to 200 drops essential oils
3 fun bath salts recipes for different needs
Recipe 1: Sooth Those Sore Muscles Bath Salts
2 cups borax 2 cups Epsom salts 1 cup baking soda 1/3 cup peppermint, powdered 50 drops each essential oil: eucalyptus, rosemary, lavender 30 drops peppermint essential oil (optional)
Recipe 2: Ritual Soak Bath Salts
½ cup baking soda ½ cup sea salt 1/3 cup mugwort herb, powdered 11 drops sandalwood essential oil 9 drops lavender essential oil
Recipe 3: Aphrodisiac Salts
1 cup borax 1 cup baking soda ½ cup rose petals, powdered 20 drops rose geranium essential oil 20 drops ylang-ylang essential oil 10 drops patchouli or sandalwood essential oil
You can find all the high quality ingredients for these recipes here ^^^, love
Making a homemade facial cleanser can be quite simple. My preferred methods are using cleansing grains or powders, oil or food items with an occasional steam.
Soap strips away the very important skin oil and sets up a cycle of over- or under-production of sebum which can result in more break-outs, dry and flaky skin and a dependency on soap.
Suds, bubbles and lather signify saponins, a constituent of some plants and soap that “cut grease”. This might be nice for the dishes, but for the face, a more gentle approach will lead to healthier skin.
What does the skin need then?
Exfoliation of dead skin from top layer
Mild drawing out of dead skin, dirt and other residues above from upper layers
To be able to freely breathe and exchange gases with outside air
To produce enough oil to lubricate and protect
In order to do that, let’s look at some homemade facial cleanser recipes:
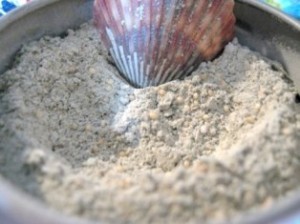
1) Cleansing Grains
Cleansing Grains provide exfoliating, healing and drawing properties, removing surface dirt and excess oil. I rely on this product as my primary cleanser and it can also double as a mask.
Directions for all the Cleansing Grains recipes: use an electric grinder or mortar and pestle to grind the herbs to a coarse to fine powder, depending upon your preference. I prefer a more fine textured mix. Put the herbs in a bowl.
Next grind the oatmeal, rice or other coarse textured grain and put that in the bowl.
Now you can add the clays, amaranth and other smooth textured ingredients.
Stir well until everything is evenly distributed.
Store in a dry container with a seashell for a scooper (or some other scooper!) for easy use.
To use: scoop 1 to 2 teaspoons of scrub into the palm of your hand, wet with water and use this paste to scrub your skin, massaging gently. Rinse with water and pat dry. As a substitute for water, you could use yogurt, rosewater, or honey as the liquid for extra cleansing and rejuvenating effects.
Below are a few of my personal recipes to get started. Originally all of these recipes were sold through my natural skin care shop with positive feedback. You can find ingredients for all of these recipes here.
This homemade facial cleanser is specially designed for acne-prone skin, utilizing many healing and beneficial herbs. The herbal combination was selected for their antimicrobial, antiseptic, and soothing abilities.
French green clay is rich in minerals and its highly micronized state allows far more absorption of dirt, dust, oil, contaminants, and make up than any other clay. It helps to draw out impurities from the skin and brings fresh blood to damaged skin cells, helping to tighten and revitalize pores. It is excellent for clearing problem skin.
Oats are mucilaginous and gently healing to the skin. They soothe inflammations and provide a texture that is easy to spread on the face.
Amaranth has a bead-like texture, effective for gentle exfoliation.
Ingredients:
Green clay 1 cup
Kaolin clay 1 cup
Organic oatmeal ½ cup
Amaranth ½ cup
A combination of the following herbs: thyme, spilanthes, sage, elder flowers, comfrey leaf 1 cup
This is a smooth, sweet way to cleanse your face. It doesn’t have any coarseness to it. Honey is antibacterial and a humectant (it attracts moisture). Buttermilk is very soothing and softening. The clay adds just the right amount of pulling of dirt and residue.
Mix together and store in a dry place, no grinder needed.
2) The Oil Cleansing Method
The Oil Cleansing Method uses oils and water to deeply clean the skin and create dewy, vibrant, moist skin.
3) Pure Water or Toners
Pure water can be used in the morning with some gentle massaging to remove excess oils.
Toners and astringents in a base of witch hazel or apple cider vinegar will remove excess oils and surface dirt. These are great to use midday to “freshen up”.
4) Food Items as a Homemade Facial Cleanser
Many fruits and veggies have cleansing abilities. Do you have any of these on hand?
Avocados
Yogurt
Lemon (dilute this with water)
Simply mash or blend them to a spreadable consistency. Apply to the face with a massaging motion and rinse with pure water.
I was excited to find Caroline’s highly informative website when researching skin care in ancient Egypt and delighted that she agreed to do this interview with me. It is both fascinating and revealing that many of the commonly used ingredients are still used today! I hope you enjoy this interview and if so, please pass it along!
1) Could you elaborate a bit on the ancient Egyptian philosophy on skin care?
The ancient Egyptian concept of medicine was partially based on magic, and it is from such medico-magical texts that we can understand the ancient Egyptian philosophy of skin-care:
“Six volumes containing ‘the secrets of the physicians’ are said to have been kept in Egyptian temples. Medical works were certainly handed down over long periods so that glosses became incorporated into the texts. Some of the surviving papyri are specialist works; others contain treatments for a wide variety of conditions and even household hints and recipes for cosmetics.” (Pinch 1994, p. 133)
One such medico-magic remedies was for bald patches. ‘To charm away alopecia’, the sufferer had to recite a spell or prayer to the sun god over a collection of iron, red-lead, onions, alabaster, and honey.
Yet much of their skin and body care was practical. All ancient Egyptians used cosmetics, regardless of sex. As Egypt is a hot and dry climate, bathing was a necessity; priests, especially, had to be clean and bathed several times a day. A paste made of natron (swabu) and ash or clay was used as a soap, as well as for cleaning teeth, and as a way to combat certain skin diseases. Oils and unguents were then rubbed into the skin to keep it supple, and they used different forms of deodorant which incorporated incense as an ingredient.
The black eyeliner (mesdemet) used by the Egyptians to prevent themselves from being dazzled by the sun was derived from galena, which was also used to assist with eye complaints due to its disinfectant properties. Green eye makeup was also popular. So although some of their treatments seem unusual – or downright bizarre! – to the modern eye, the ancient Egyptians had an extensive working knowledge of their environment and what could be used to both beautify themselves, and protect themselves against the Egyptian climate.
2) What were some common skin care practices and routines amongst the ancient Egyptians and how did this differ between the classes?
The major difference between the classes when it comes to skin-care was one of quality. Most people would have applied their own makeup after having washed in the Nile, and had access to caster or linseed oils and a few important cosmetic ingredients for their skin.
The rich, however, could hire a professional cosmetician (seshat), or even a professional hairdresser (shen), and they would import exotic, perfumed unguents, kept in well-stocked cosmetic boxes, for use after cleaning themselves in their limestone bathrooms.
Another example, according to Tyldesley (1994, p. 147), is that while the general populace would probably have used flint flakes as razors and oil as shaving-cream, the nobility had access to metal razors, tweezers, knives and soap for depilation purposes. Yet the ancient Egyptians, rich or poor, male or female, would not have dreamed of going without their cosmetics!
3) I am really interested in skin care products, oils, herbs or other substances that were used by the ancient Egyptians. Can you tell us about some of these and their uses?
The Egyptians had an extensive knowledge of beauty treatments, from the simple to the complex. Scholars have not, as of yet, managed to translate all ingredients that were used, but a number of treatments are known. According to Manniche (1989, p. 44), one facial cleanser was made from oil and lime, whilst a body scrub was a paste made of a mixture of calcite, natron, salt and honey.
An anti-wrinkle treatment involved frankincense, wax, moringa oil, and cypress grass mixed being with fermented plant juice. To make the skin ‘more beautiful’, alabaster powder, natron powder, and sea salt were mixed with honey and rubbed into the skin.
One of the more bizarre suggestions from the Papyrus Ebers was a facial cleaner which would ‘make the face smooth’. It involved mixing bullock’s bile, whipped ostrich egg, oil, dough, natron, a type of resin and milk, and had to be used daily. A concoction to prevent baldness involved writing fluid, hippopotamus fat, and gazelle dung! However, as Pinch (1994, p. 134) points out, some of the more repellent-sounding ingredients may be code for herbs and other more normal substances.
However, two recipes from the Papyrus Ebers stands out in particular:
“Another to cause the hair to fall out: burnt chaetopod (?), boiled with oil and balanites-oil, is applied to the head of a hated woman (i.e. a fellow-wife).
Another: burnt leaf of lotus, is put in oil and applied to the head of a hated woman.
To expel it in the following manner: shell of tortoise, is burnt, ground and placed in fat from the leg of hippopotamus and (it) is anointed therewith very, very often.” (Ebbell 1937, p. 80)
The more beneficial skin-care treatments often included oil, fat, wax, honey, natron, and milk. I would recommend reading Lise Manniche’s An Ancient Egyptian Herbal if you wish to learn more about the specific plants used by the ancient Egyptians.
I will close with a modern adaption of an ancient Egyptian remedy for wrinkles:
Ancient Egyptian Anti-Wrinkle Oil Updated
One teaspoon sweet almond oil Two drops of essential oil of frankincense
Apply to the cleansed face nightly with a gentle massage. (Illes)
A big thank you to Caroline!!
Do you use any of these ingredients in your skin care routine?? Share below!
Sources: Bryan, C. P. 1930, The Papyrus Ebers: Translated from the German Version Dollinger, A., Personal Hygiene and Cosmetics, <http://www.reshafim.org.il/ad/egypt/timelines/topics/cosmetics.htm> Ebbell, B. 1937, The Papyrus Ebers: The Greatest Egyptian Medical Document lles, J., Beauty Secrets of Ancient Egypt, <http://www.touregypt.net/egypt-info/magazine-mag06012000-mag4.htm> Manniche, L. 1989, An Ancient Egyptian Herbal Pinch, G. 1994, Magic in Ancient Egypt Strouhal, E. 1992, Life of the Ancient Egyptians Tyldesley, J. 1994, Daughters of Isis: Women of Ancient Egypt
About Caroline:
Caroline is currently studying a Bachelor of Archaeology at La Trobe University in Australia, with the aim of getting into Honours after she completes the degree. She is specialising in ancient Civilisations, and has studied the Maya, Aztec and ancient Egypt under Professor Peter Mathews. She has worked on various archaeological digs within Australia, and for a commercial archaeology company for three years. She has written about ancient Egypt since 2000, and has been published in the free online TourEgypt magazine, and in Orascom Telecom’s TALK magazine. You can learn more about Caroline’s work on her website.
An effective and natural homemade exfoliant may be right at your fingertips. Many common foods can exfoliate as well as natural sponges or loofahs.
Exfoliation means to remove the surface and removing the very top layer of dead skin reveals new, fresh and vibrant skin.
Excessive abrasion can lead to skin irritation, so be gentle. Exfoliation also increases sensitivity to sunburn. The outer layer of dead skin is protective.
The benefits of exfoliation include increasing circulation to the surface which renews skin cells and creates a healthy glow, decreasing lines and signs of aging and removing the top dead layer of skin, which can be more easily penetrated by other beneficial substances.
An exfoliant can work in 2 ways: physical or chemical.
Physical Techniques
There are two ways to apply physical techniques for exfoliation:
Using a tool, like a brush, sponge or loofah
Deep exfoliating silk mitts – great for face and body
Using a substance like salts, sugars, grains, and herbs
Using a homemade facial cleanser such as cleansing grains has an exfoliation property. On a continual basis, dead cells will be sloughed off with the action of semi-abrasive grains like oats, rice and corn. Salts are best left for the body; they are a bit too harsh for the face and can be drying as well. Sugars are a treasure in that they act by both physical and chemical ways. And of course, herbs have many other powerful healing properties and can be formulated to suit the situation.
Natural Chemical Methods
Plants and natural ingredients are composed of many different chemicals. Three main categories are able to exfoliate the skin through a gentle peeling action. They are:
Food items, including many fruits, contain AHAs. These acids are gentle, yet they can remove dead skin through a smooth buffering action. With regular use, exfoliation will help to brighten the skin, decrease fine lines and even out skin tone.
As the list below demonstrates, fruits are high in different AHAs and there are also plants high in beta-hydroxyacids (salicylic acid). They are also commonly available and inexpensive! You can get really creative with combinations.
Check out this list of acids and enzymes found in common foods:
Sugar works in both physically and through its glycolic acid content. Use a fine grained sugar for the face and other sensitive areas.
Cleopatra utilized sour milk for her beauty regime. The lactic acid is milder and less irritating than some of the fruit acids and glycolic acid.
Sweet Love for Smooth Skin
Here is a pure and potentially delicious homemade exfoliant recipe using sugar, milk and fruit.
Ingredients:
Unrefined dehydrated cane juice sugar (sometimes known as Rapadura)- 1 tablespoon
Organic strawberries- 1
Sour milk or yogurt- enough to make a paste
Directions:
Blend up the strawberry, mix with sugar and add just a bit of yogurt or sour milk. Apply to face and leave on for 10 to 15 minutes. Rinse with warm water. This can be used 1 to 3 times per week for best results.
A Real Salicylic Acid Exfoliant for Acne
This is a most useful homemade exfoliant for dealing with break-outs and acne.
Ingredients:
Meadowsweet or white willow bark powder- 1 tablespoon
Apple Cider Vinegar- enough to make a paste
Directions:
Simply mix herb powder and vinegar to make a spreadable paste. Apply to face for 10 to 15 minutes. Rinse off with warm water. Use 1 to 3 times per week.
Bright Lemon Peeler Exfoliant
This facial peel is strong and will sting, so be careful not to use too often. It can also further enhance sun sensitivity as it uses citrus, which is known to do that. This mask can help to brighten the complexion and remove the top layer of dead skin. The effects are most notable when used over time, though I usually notice the next day that my skin looks brighter and clearer.
Substitute with other fruits like lime, grape, cranberry, strawberry or apple for lemon using this same recipe.
Ingredients:
Juice of lemon- enough to cover face
Warm water
Facial oil- I use extra virgin olive oil
Directions:
It’s helpful to pull the hair back off the face. Rub the oil all over your face and neck. Next get a couple drops of warm water and pat this on your face. Next pat the lemon juice on your face.
Allow this to set for about 1 minute, not long enough to dry. This will sting.
With your index and middle fingers rub this emulsion with a circular motion. You may feel a little ball start to form. Discard it and rub in another area. Do this until your whole face and neck have been covered.
Rinse with warm water, followed by cold. Then spritz a toner or floral water and finish with a light oil or moisturizer.
Comfrey oil (Symphytum officinale) is another potent herbal remedy for skin care. It is high in allantoin, a mucilaginous healing substance that causes cell growth.
An old European folk remedy, many uses of comfrey abound.
Being mucilaginous, common uses of comfrey include healing wounds, preventing scars and treating existing ones, decreasing dryness and flaky skin, and soothing irritated skin.
Comfrey also has mild astringent and drawing qualities, making it useful for alleviating cysts, toning a loss of texture/firmness on the skin and increasing movement of fluid within the joints.
It is anti-inflammatory and analgesic and has been used externally as an ointment to assist in the healing of sprains and broken bones.
It also shows effectiveness in treating atopic dermatitis, psoriasis and eczema.
Care needs to be taken not to use comfrey too soon on wounds, as it may heal the top layers before the lower which could lead to infection. Comfrey root is also fairly high in pyrrolizidine alkaloids, which are a liver toxin. External use in small doses when the liver is healthy is considered safe.
Both the root and leaf are useful for making comfrey-infused oil. Comfrey leaf has an irritating and prickly texture. It can cause some contact dermatitis; however, it is a soothing agent when broken up! The root is very juicy, mucilaginous and high in allantoin.
If possible, use freshly dried herbs for this purpose.
To freshly dry comfrey root: dig the root when it is dry weather, clean by hand or using some water and a vegetable brush if needed. Brush the root gently however. Chop finely; lay out on a paper bag overnight.
To freshly dry leaves: harvest, wipe the dirt off with a towel, and allow to dry whole overnight.
Here is my favorite comfrey oil recipe:
Ingredients:
8 oz Comfrey leaf (70%) 4 oz Comfrey root (30%) Extra virgin olive oil, to cover, approximately 16 ounces
Directions:
The roots should already be broken down by chopping. Go ahead and break up the leaves by hand. To make this using the cold infusion method, put all the herbs in a 16 ounce glass jar, cover with olive oil, cap and shake. This can steep for 28 days. To strain, use an old t-shirt lined in a strainer, pour the mix through into a bowl and squeeze the t-shirt with herbs in it. The strained liquid is your comfrey oil!
To make comfrey-infused oil using another method, including those that take less time, check out the article Herbal Oils.
Reference: Efficacy of a Comfrey root extract ointment in comparison to a Diclo-fenac gel in the treatment of ankle distortions: Results of an observer-blind, randomized, multicenter study. Predel, Giannetti, Koll, Bulitta, and Staiger, 2005.
Photo Credit: By Frank Vincentz (Own work), via Wikimedia Commons
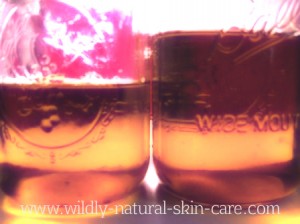
Herbal oils are fantastically useful and practical to have on hand.
I’ve used them as an emollient for the bath, as a body moisturizer, for all dry or irritated skin, on the hair and scalp, fingernails, for massage, as spiritual anointing oils, daily abyangha practice, as a base for creams and salves, face moisturizer, as cleansing agents…herbal oils are mult-faceted.
Herbal oils are also called infused oils, or herbal-infused oils. They are a mixture of herbs with a natural skin care oil, in this case a “carrier oil”.
They are NOT essential oils. Essential oils are made through a distillation process.
Herbal oils are made through soaking the plant material into a carrier oil for a set period of time. This process extracts the oil-soluble plant components into the carrier oil. Then, that is strained out and what is left is the herbal oil which can be used for skin, hair, or any concoction you are making.
The most commonly used carrier oil is extra virgin olive oil, though they can also be made with coconut oil, jojoba oil, sweet almond oil, apricot kernel oil, grapeseed oil and most other plant oils, or even lard or ghee.
The herbs chosen for the process will depend on what purpose the oil will be used.
Some common herbs used in this preparation include calendula flowers, comfrey root and leaf, plantain leaf, elder flowers and lavender flowers. I’ve made oils with many other herbs, like rose petals, dandelion flowers, marshmallow root, dong quai, and poke root.
Though I prefer to make them with dry or freshly dried herbs, some herbalists use fresh herbs for their blends. I’ve had a few batches of freshly-made herbal oils develop mold and though it can be removed, I’d rather not be worried about re-growth.
How to Freshly Dry Herbs for Your Oils
Harvest the herbs, lay out somewhere with good air circulation and leave for 12 to 24 hours. That’s it! When the herb appears and feels like it is losing its water content, it is ready to use. It will be somewhat withered but not yet crunchy.
There are several ways to make herbal oils as well. It is always good practice to label creations with the herb used, oil used, quantity of each, method used and date.
Creating an herbal oil is a magical process.
Way 1: Cold Infusion
Fill jar ¾ full with dry herb
Cover with carrier oil of choice
Allow to steep in a cool, dark place for 4 weeks
Strain and squeeze herb (at this point called the marc) to get every last drop. You may run the herb and oil through some layers of cheesecloth or an old cut up t-shirt which makes it easier to squeeze.
Way 2: Stove-top Method
Set up a double boiler and turn stove on. Allow the water in the double boiler to get to a simmer. Alternatively you can turn the stove on after step #4
Fill Pyrex jar with herb
Cover with carrier oil of choice, fill to just above the top of the herbs
Place the jar in the water
Using a chopstick, continually check the temperature of the oil and agitate the herbs. You want the oil to be hot, but not burning. If it is burning your skin, turn the heat down and/or remove the herb/oil infusion until it gets right below that warm/hot spot.
Allow the mix to warm for an hour minimum and as long as 4 hours.
Strain, allow to cool, and press out the oil.
Way 3: Sun Infusion
Follow the procedure for Cold Infusion above but…
Rather than storing in a cool, dark place, set out in a sunny area or windowsill
Leave for up to 4 weeks
Strain as above
Way 4: Yogurt Maker or other low, slow heat Method
Fill jar to ¾ full
Put in a yogurt maker and cover
Allow to infuse for 24 to 48 hours
Strain as above
A note on this method: the yogurt maker maintains a constant temperature of about 90 degrees F, so any other low, slow heat methods need to be around that temperature.
I’ve had a lot of folks ask about using a Crock Pot to make herbal-infused oils, and unfortunately, the lowest setting on these is about 150 degrees F, which is TOO HOT for this. The high heat will degrade both the herbs and the oils. That being said, you can greatly nurse the Crock Pot for a fresh and juicy herb, it requires lots of watching over a period of time.
Which method do I prefer?
It really depends on time availability. I find myself using the cold and stove top methods most often, followed by the yogurt maker. I’ve made just a few sun infused oils, particularly with fresh herbs and they’ve turned out well.
Crafting Herbal Oils for Specific Uses
Looking to make an herbal oil for a specific use like acne or psoriasis?
Maybe you’d like to create an erotic massage oil or something for sore muscles?
As herbal oils can be made with any herb, I encourage you to browse the ‘herbal skin care’ section of this site to learn all about how to make a healing oil for your particular needs.
The second part of crafting an herbal oil is selecting the carrier oil, potent in the final product as well. For that please check out articles within the ‘natural skin care oils’ section.
Natural skin care recipes can be very simple or highly complex. They can be made from fresh fruits and vegetables, natural skin care oils and herbs, essential oils and butters, waxes and other natural ingredients. Click natural skin care recipes to share your best of best!
I started creating natural recipes in 2004 when I got involved with herbal medicine, healthy eating and practices of yoga and tai chi. For me, caring for my skin naturally was a likely next step- I didn’t want to eat chemicals and preservatives so why would I want them on my body?
Here are some questions to ask yourself before creating a recipe:
1) What is my purpose for creating this recipe? Cleansing, moisturizing, dealing with (fill in the blank), for pleasure, for the bath? This will give you a good idea of what type of product to make as well as herbs and oils to use.
2) Am I looking for something to use up now or to store for regular use? Many fun facial masks, cleansers and scrubs will be stored dry and so stay fresh. Having fun with food items will need to be used up right away.
3) What do I have on hand? It’s always great to have a range of ingredients and herbs on hand to use for multiple applications.
Staples in my natural skin care chest:
Natural skin care oils like extra virgin olive oil, jojoba oil, castor oil, coconut oil
Herbs including calendula flowers, marshmallow root and rose petals
Essential oils from the more common patchouli, tea tree and lavender to exquisites including rose, sandalwood and jasmine
Clays- I like rhassoul and green clays
Beeswax
Shea butter
Hydrosols- rosewater is a staple here
Bottles and jars can be reused!
Labels
I buy many of my ingredients and supplies from Mountain Rose Herbs. They have outstanding quality, wide selection and valuable ethics that they stand behind.
Feel for Synastry
Once you are familiar with some herbs, oils, clays and essential oils, formulating natural skin care recipes often becomes much more easy, graceful and effective. Certain substances work better with others- just like people, they all have personalities. This is based on the knowledge of the “energy” or “personality” of the plant or substance. Everything from the Earth is alive and has its own unique spirit. Learning through reading and practice will help you to hone your formulation skills.
A word on number of ingredients: crafting natural skin care recipes is an enormously creative process. It is so easy to get really excited and want to keep adding more to a recipe! Elaborate recipes certainly have their place!
Working with groups of 3 is powerful and creates a stable synergistic effect. It is also wise to work with one to get to know that substance and then increase from there. I’ve gotten so enthused about all the miraculous plants, etc. and then overwhelmed and ended up composting a lot of stuff!
Any Cautions?
Just be sure to thoroughly investigate the substances you will use. If it’s a food, it’ll generally be safe on your skin though I am thinking of the photosensitivity of citrus fruits as an example of why to be educated. If you have questions, check in here, feel free to ask below in the comments box or check out some other knowledgeable sources.
 Lately I have been very intrigued by the idea and practice of decorating the body using natural colorants. Natural ways to create the colorants include infusing oils with herbs for color using plants that have high amounts of pigments. Some of these plants include indigo, madder, henna, and alkanet.
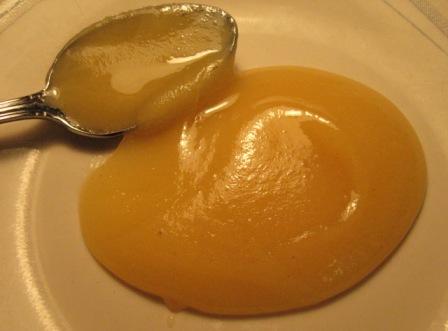 A homemade or purchased honey cleanser will soften your skin and pull out impurities. Good for all skin types, honey is moisturizing as well as cleansing.
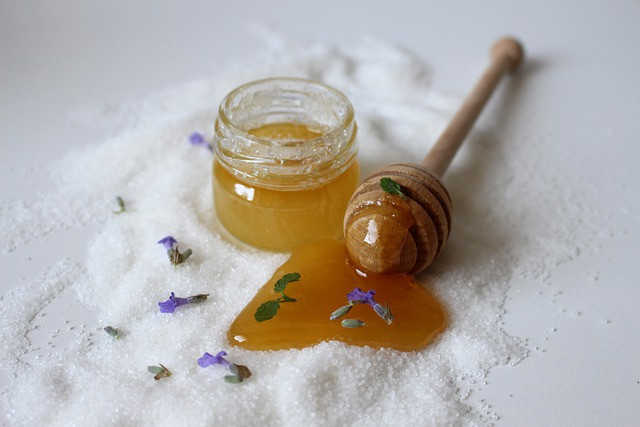
 I just love herbs that can be used in so many ways, for so many reasons! There are a variety of ways to use this sunny herb.
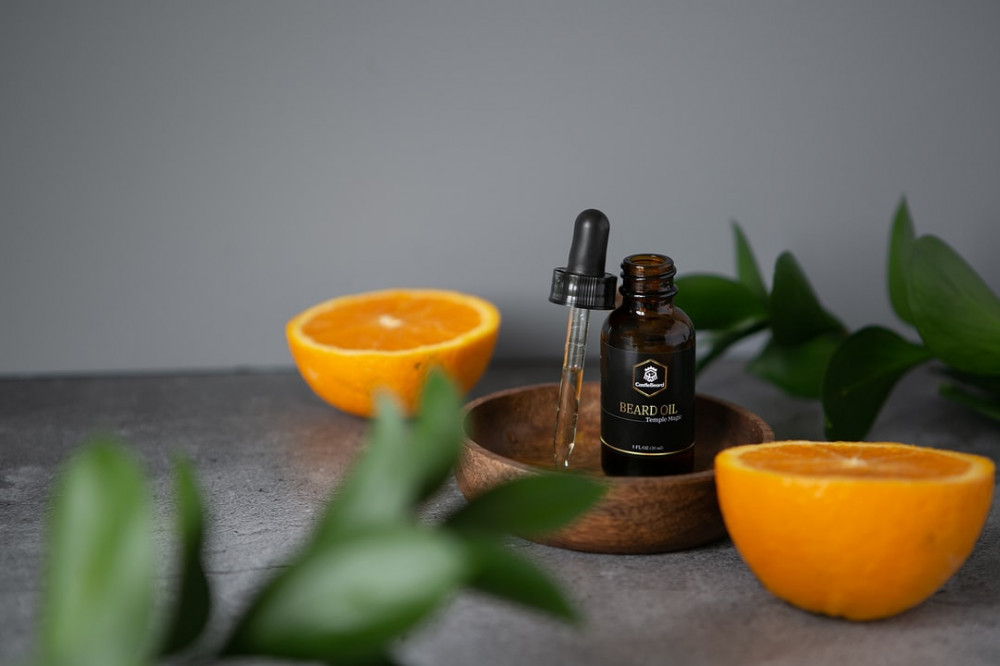


 An effective and natural homemade exfoliant may be right at your fingertips. Many common foods can exfoliate as well as natural sponges or loofahs.